This tutorial currently uses ETS2 road types and prefabs. Please contribute to the guide with an ATS version if you are able.
Tutorial 2 — Creating a basic map
This tutorial will introduce you to the basics of road placement in the map editor, and guide you through the creation of a small city block.
- Open the editor
- Draw a road
- Change the road properties
- Extending the road
- Road adjustment basics
- Prefabs
- City Roads
- Expanding the city
- Finishing the map
1. Open the Editor
Once you’ve followed the instructions in Tutorial 1, you can now launch your game. Once you’ve passed the opening logos and reached the ‘launchpad’ screen, you can open your terminal, using the tilde key. (¬, found under the Esc key)
The developer console should appear. To open the editor, type edit and press enter. After a few seconds the editor window should appear, with a car model on the screen. Press tilde again to close the developer console.
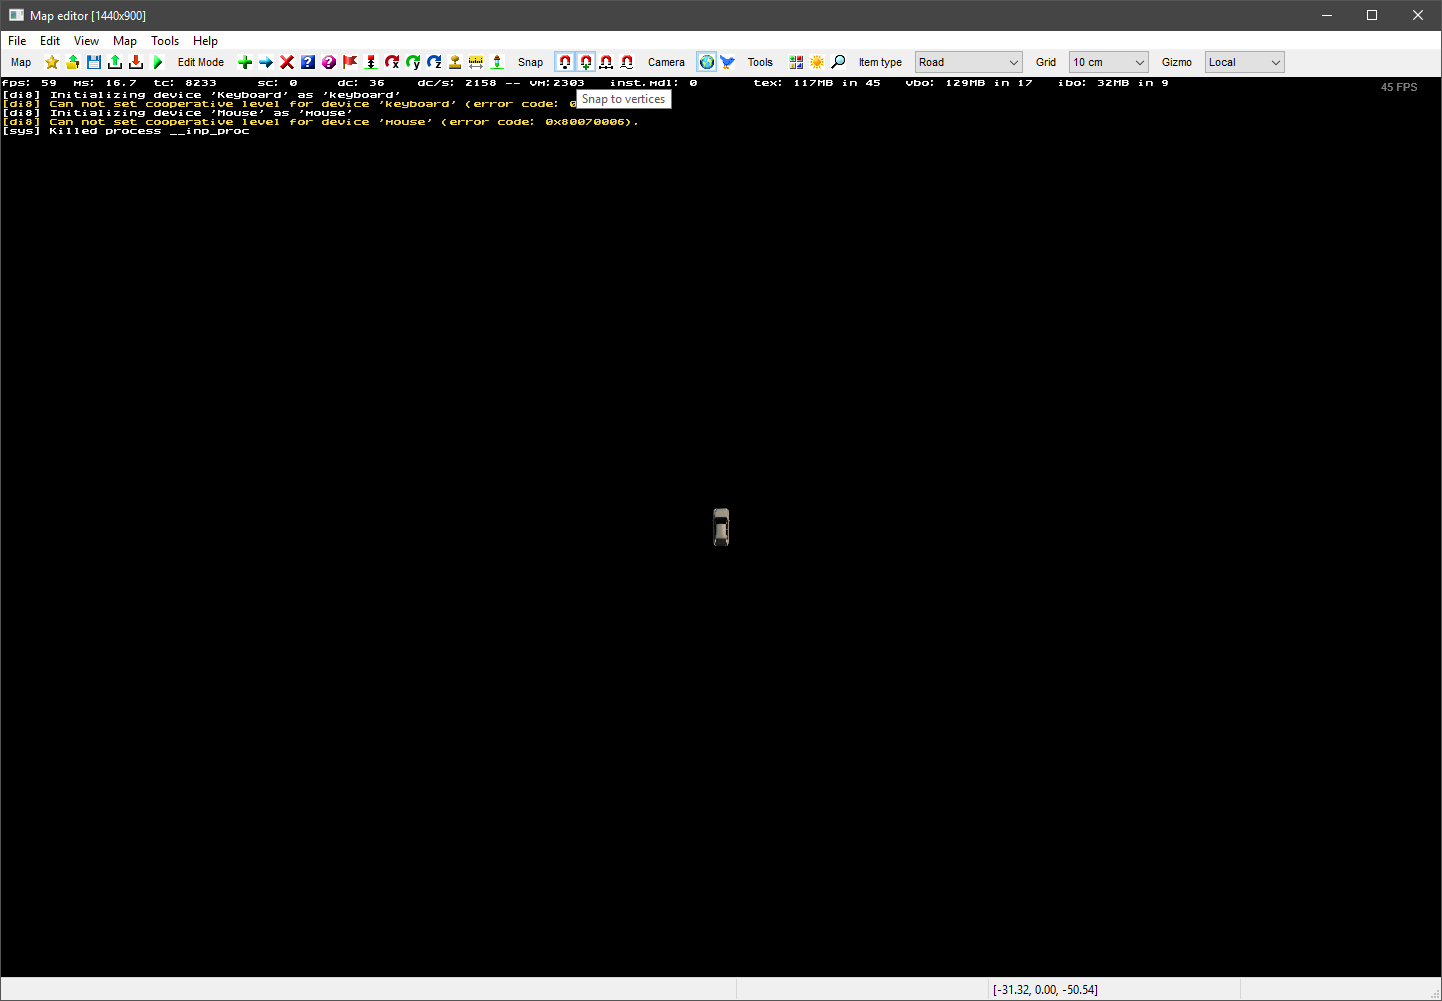
2. Draw a road
Look on the top bar of the editor. Ensure the ‘Item type’ is set to road, then press the New Item button. A new window will appear.

This dialog allows us to choose a road to place in the editor. Press the magnifying glass content browser button to the right of ‘Road Type’.
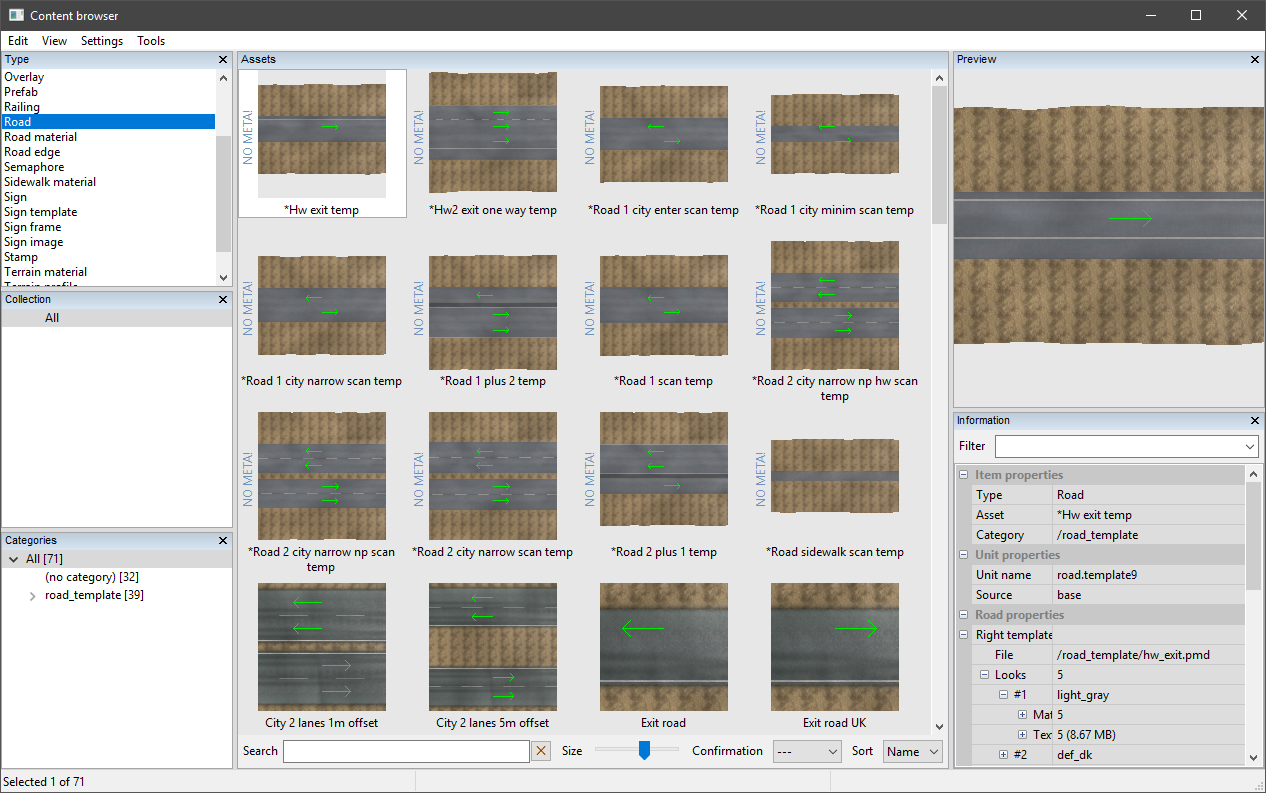
You guessed it, another window. This is the content browser, where we can inspect all of the assets in the game. For now, concentrate on the central pane, which will currently show thumbnails for all the road types in the game.
Find a road type named City 2 lanes 1m offset, this is the 4-lane road type that is found in the city areas throughout Euro Truck Simulator 2. Double click on the thumbnail for this road type, the road type in the new item window should now be updated.
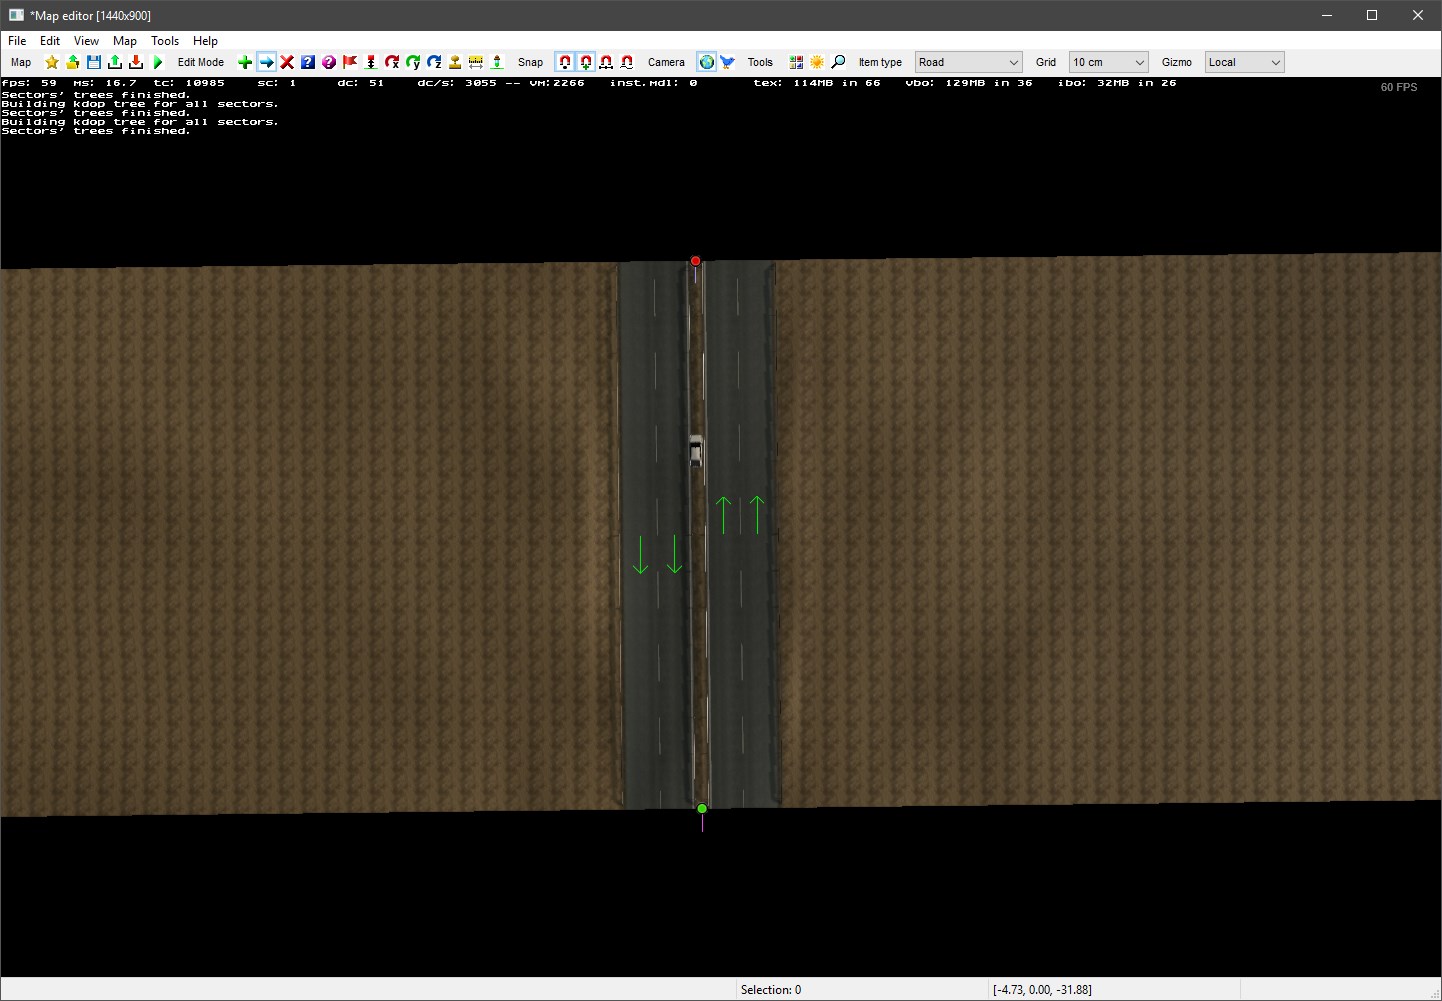
Once you’ve selected the road type, go back to the main editor window. Click above the car model to create a start node, then once more below the car, a small section of road should appear. Press Esc to finish placing road.
3. Change the road properties
Return to the top bar of the editor and select the Item Properties button. Then, double-click the red road node that we placed.

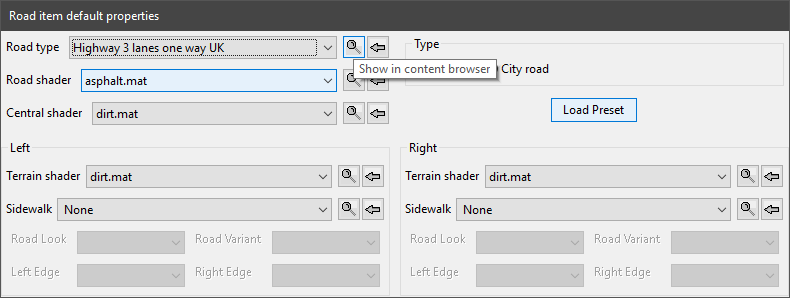
A new and slightly frightening window will appear. This window lists all of the properties for the road segment we just selected. Despite the huge number of boxes on this window, it is straightforward to understand with a little familiarisation.
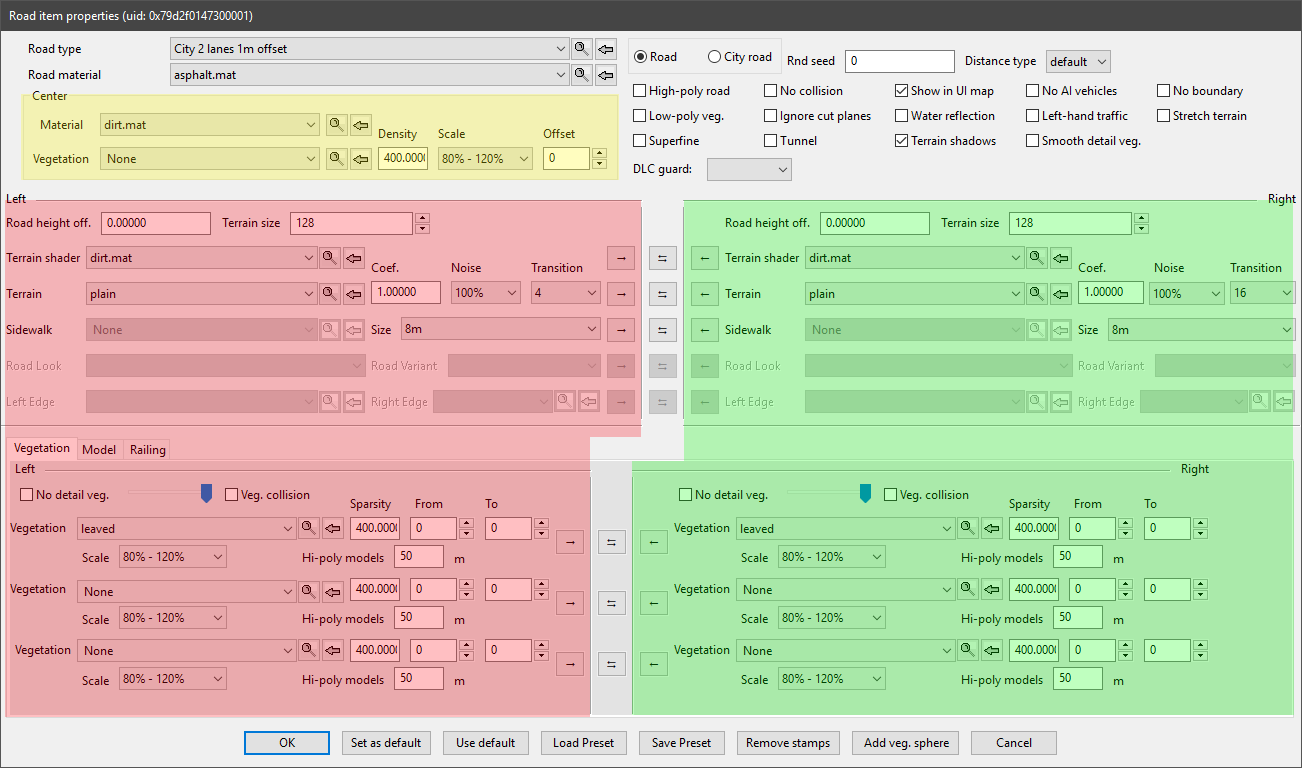
The dialog is split into options for the left and right terrain of the road, as well as the central reservation. Later we’ll also look at the main road properties found at the top-left and top-right of the window.
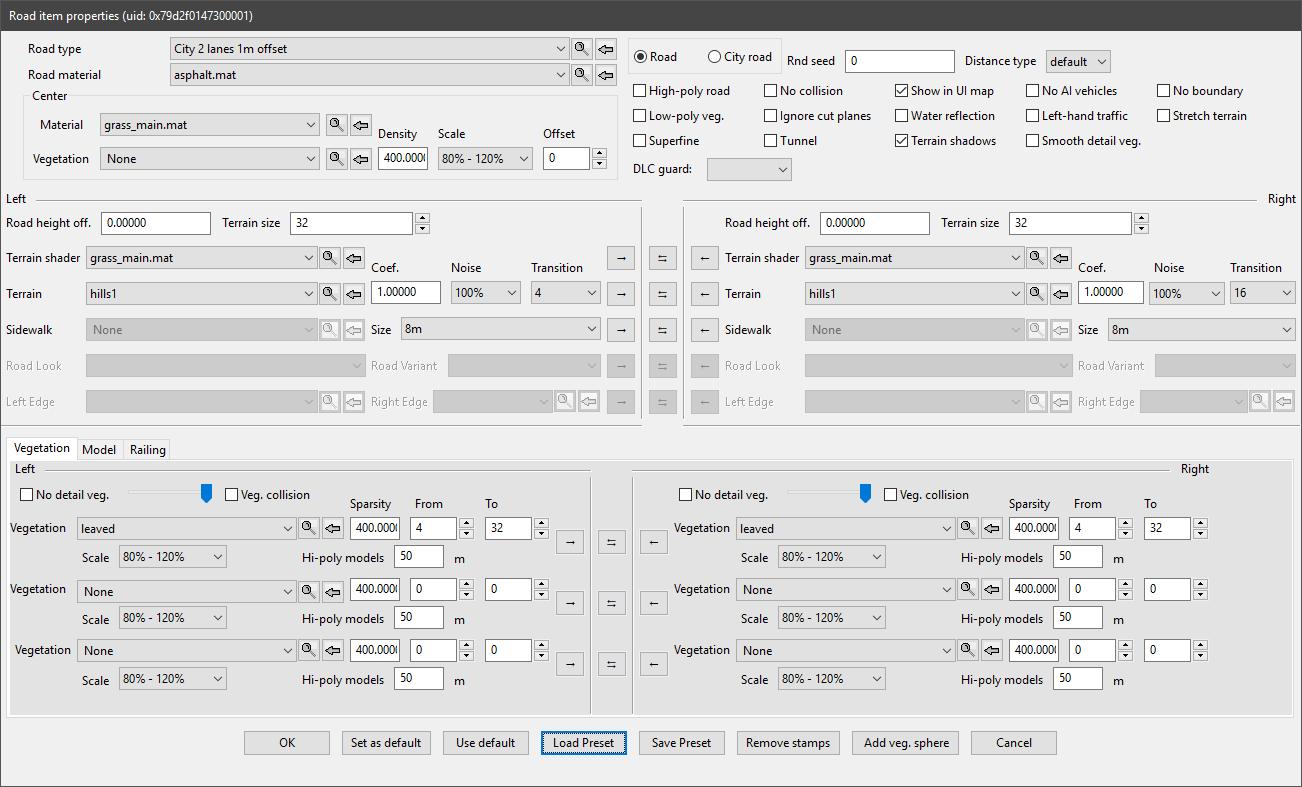
The road currently looks a little barren. Have a play around with the various properties highlighted above and see what each one does. Then, copy the properties listed below to get a typical setting.
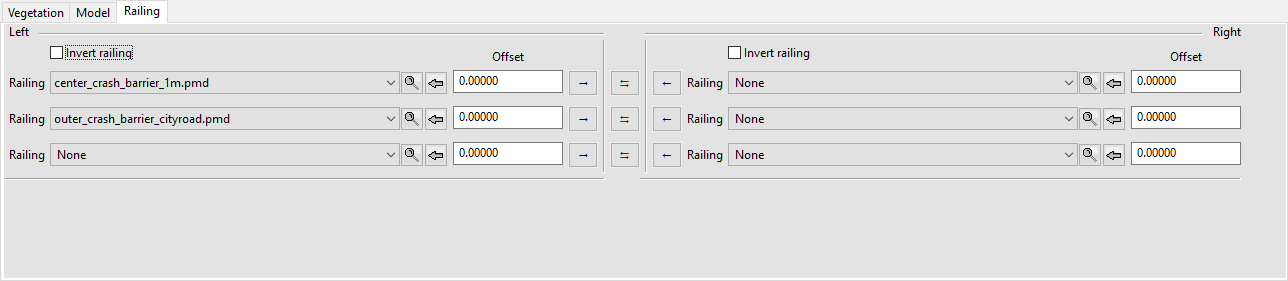
We’ll also add crash barriers to this road. Move to the railings tabs and add center_crash_barrier_1m.pmd and 1 outer_crash_barrier_cityroad.pmd. These models are symmetrical, so they can be placed in either the left or right side.
Once you’ve finished setting the properties for the road, press Set as default, so that this road is used for all new placement, then press OK to save the changes to this road.
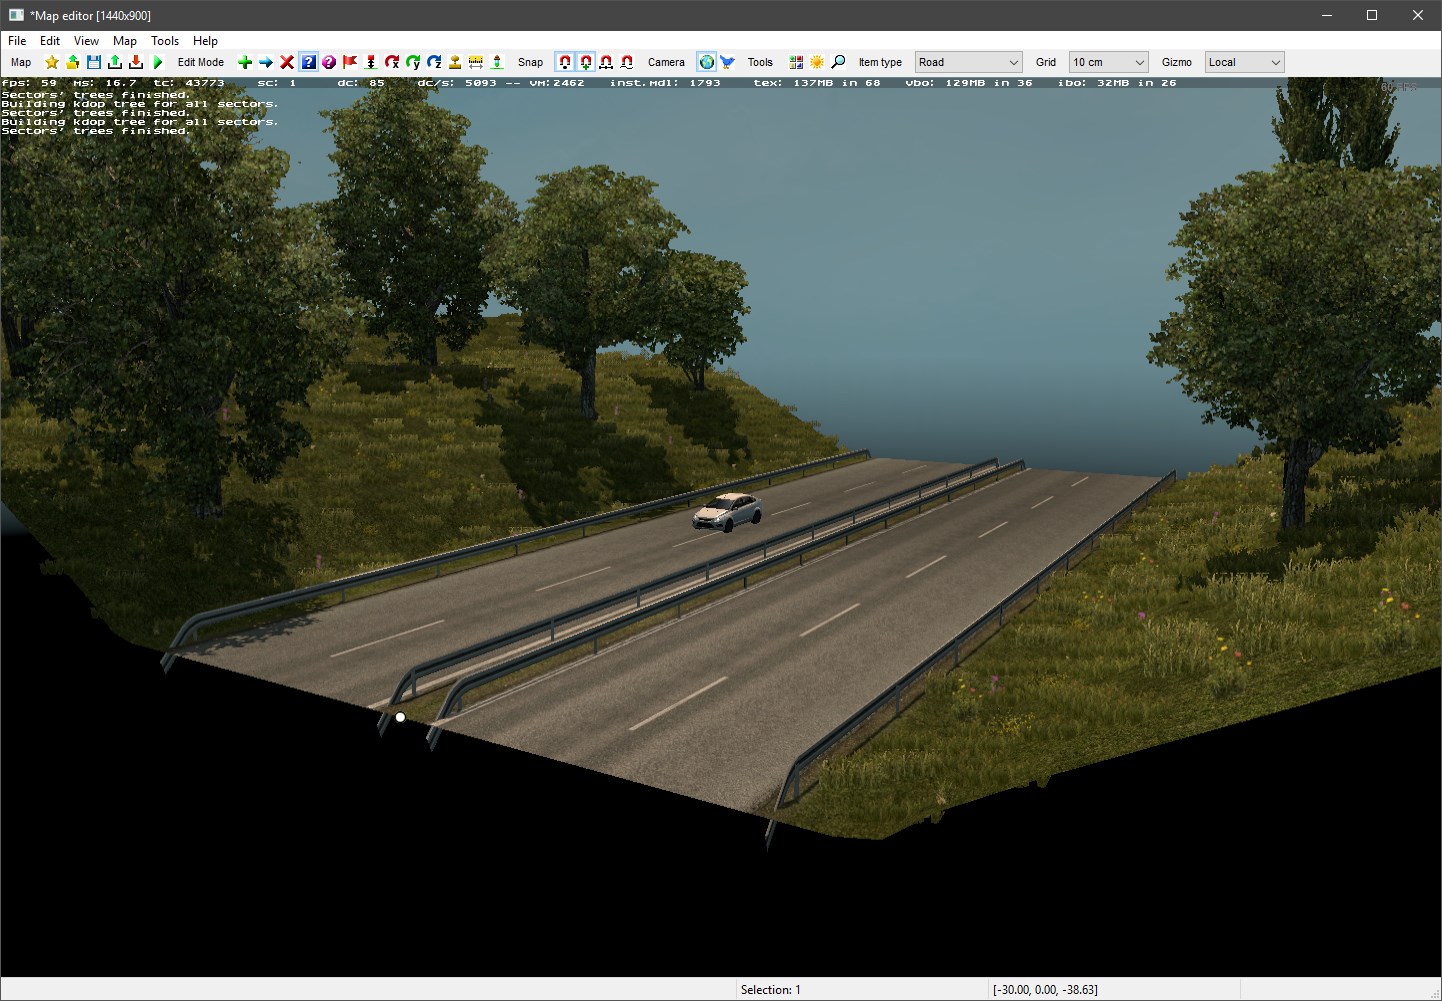
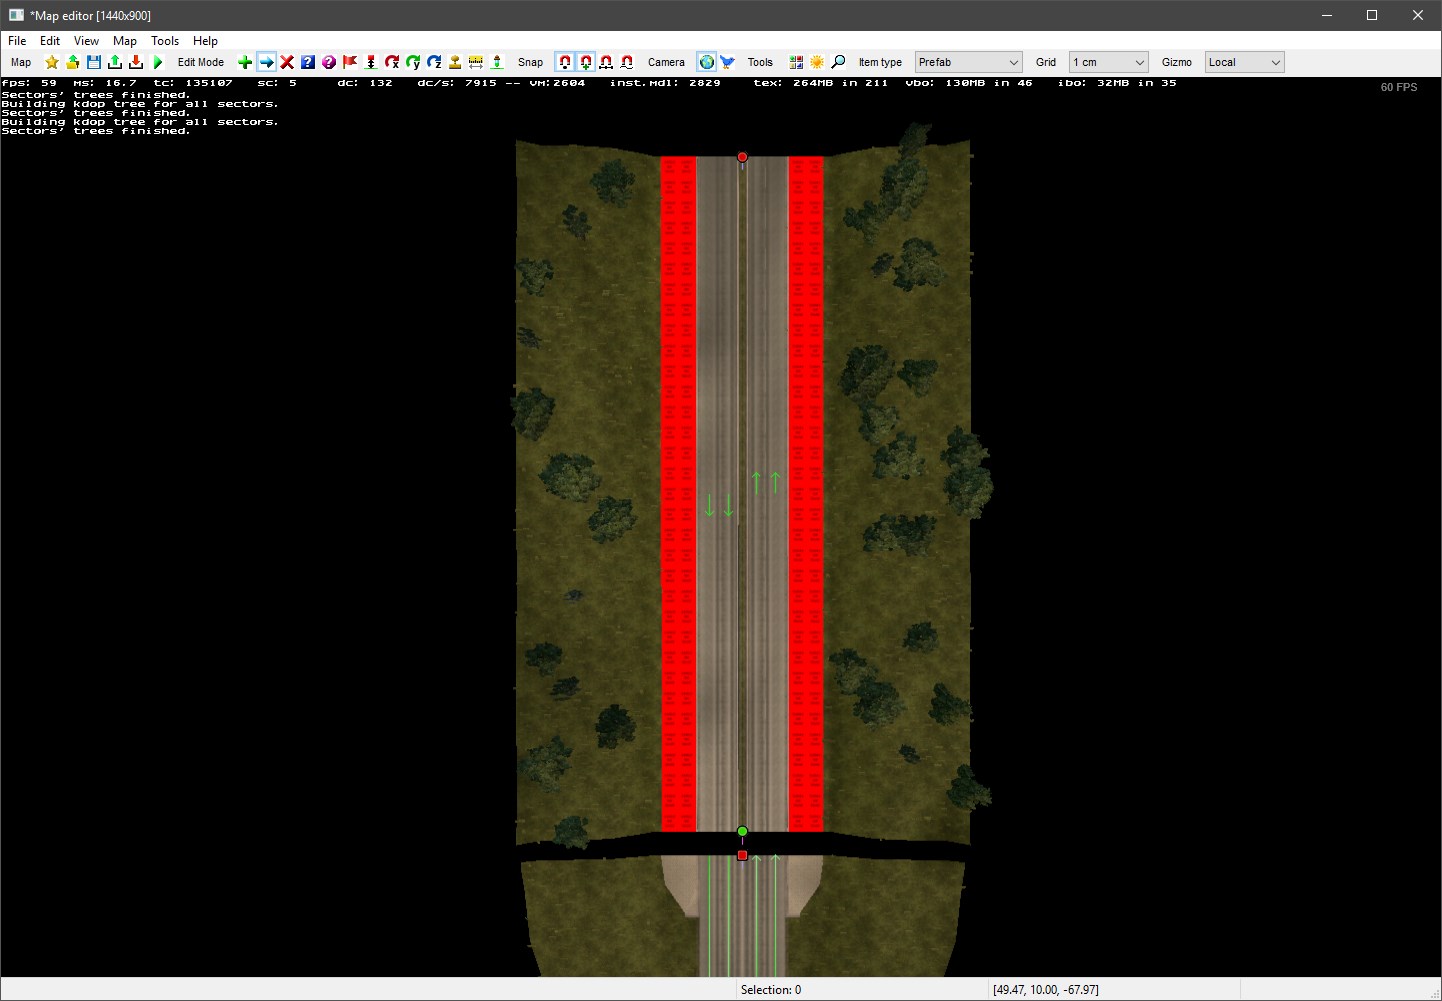
Back in the editor window, press the C key to switch to the flying camera. Your road should look something like the following image.
4. Extending the Road
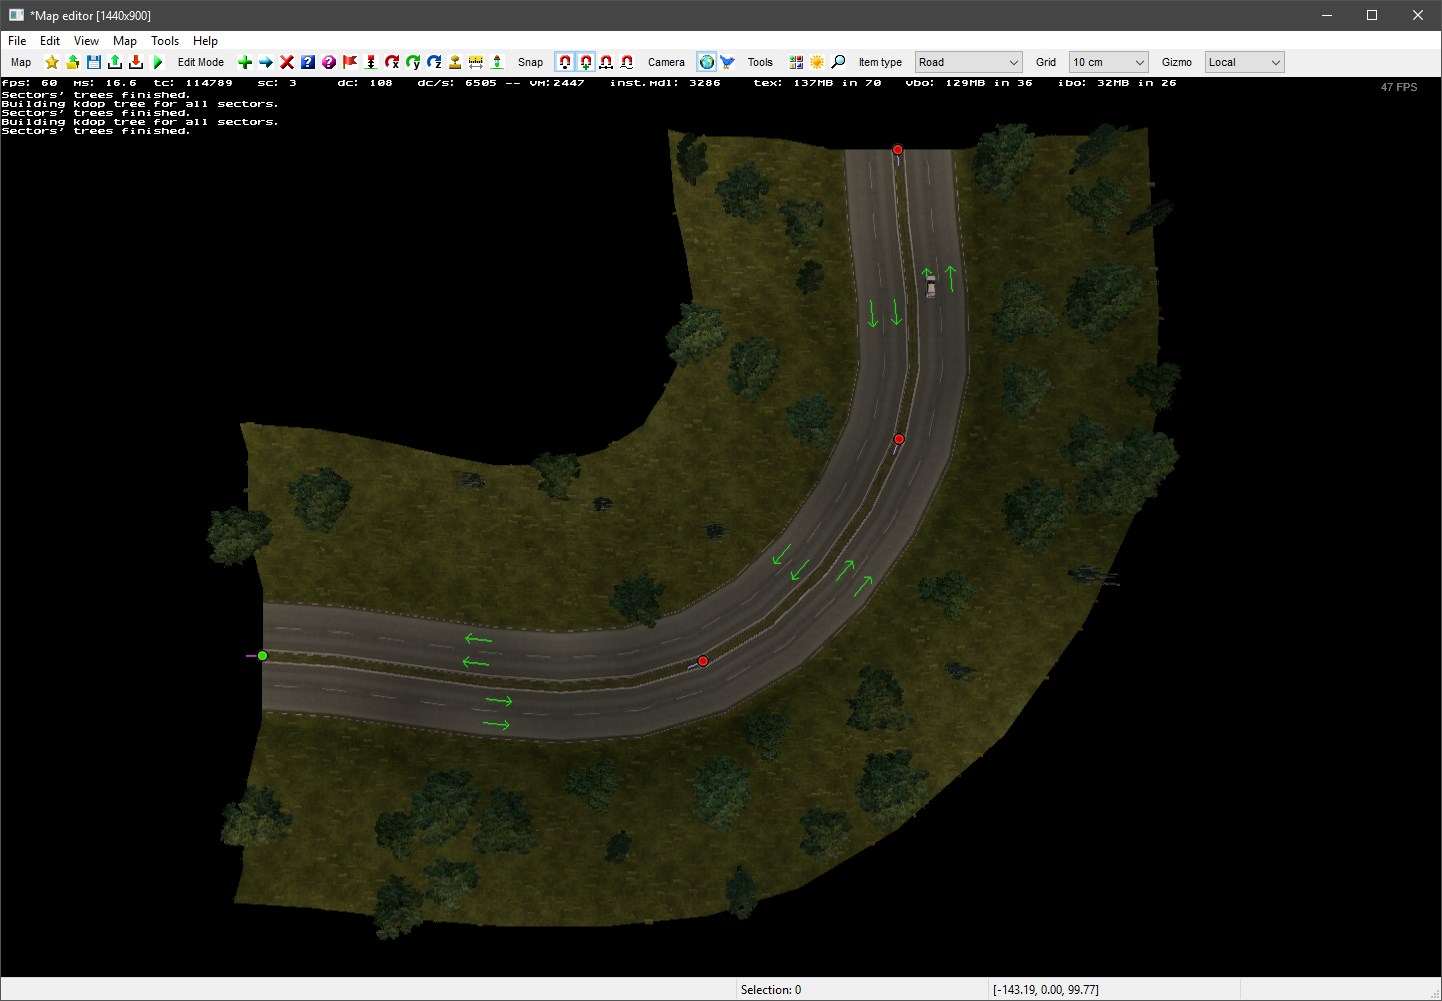
This road will lead away from what will become a small city block. We’ll extend this road to turn to the west, becoming the end point of this map.
Return to the add item mode, ensuring the item type is still road. Click on the (bottom) green road node, then place two additional nodes, as shown. Press Esc again to finish placing segments.
5. Road adjustment basics
Moving the road
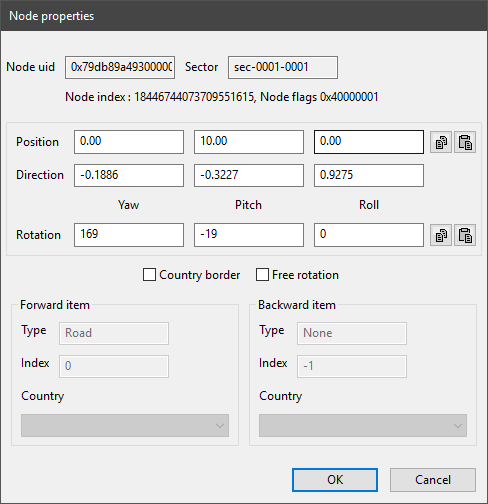
There are two editor modes for moving placed objects and nodes. The Move Item mode will allow you to click and drag a placed node, whereas the Node Properties mode will allow us to set specific positions and change the bend angles.


Switch to the Node Properties mode and double-click the first (top-most) node. Set this first nodes position to 0, 10, 0 as shown below, then click OK.
There are 3 remaining nodes (including the forward green node). Set the following positions for those nodes.
   0,  10,   60
 -40,  10,  100
-100,  10,  100
Making neater turns
By default, the angle between nodes is chosen automatically. This produces smooth curves in many situations, but tends to produce odd results on precise turns such as this right angle.
Open the second node again in Node Properties mode. we can set angles manually, by first ticking the Free rotation checkbox, then entering our own rotation in the yaw pitch and roll boxes. Round the yaw values to the nearest 90 degrees. In this case the second and third node should use the following angles.
180  0  0
 90  0  0
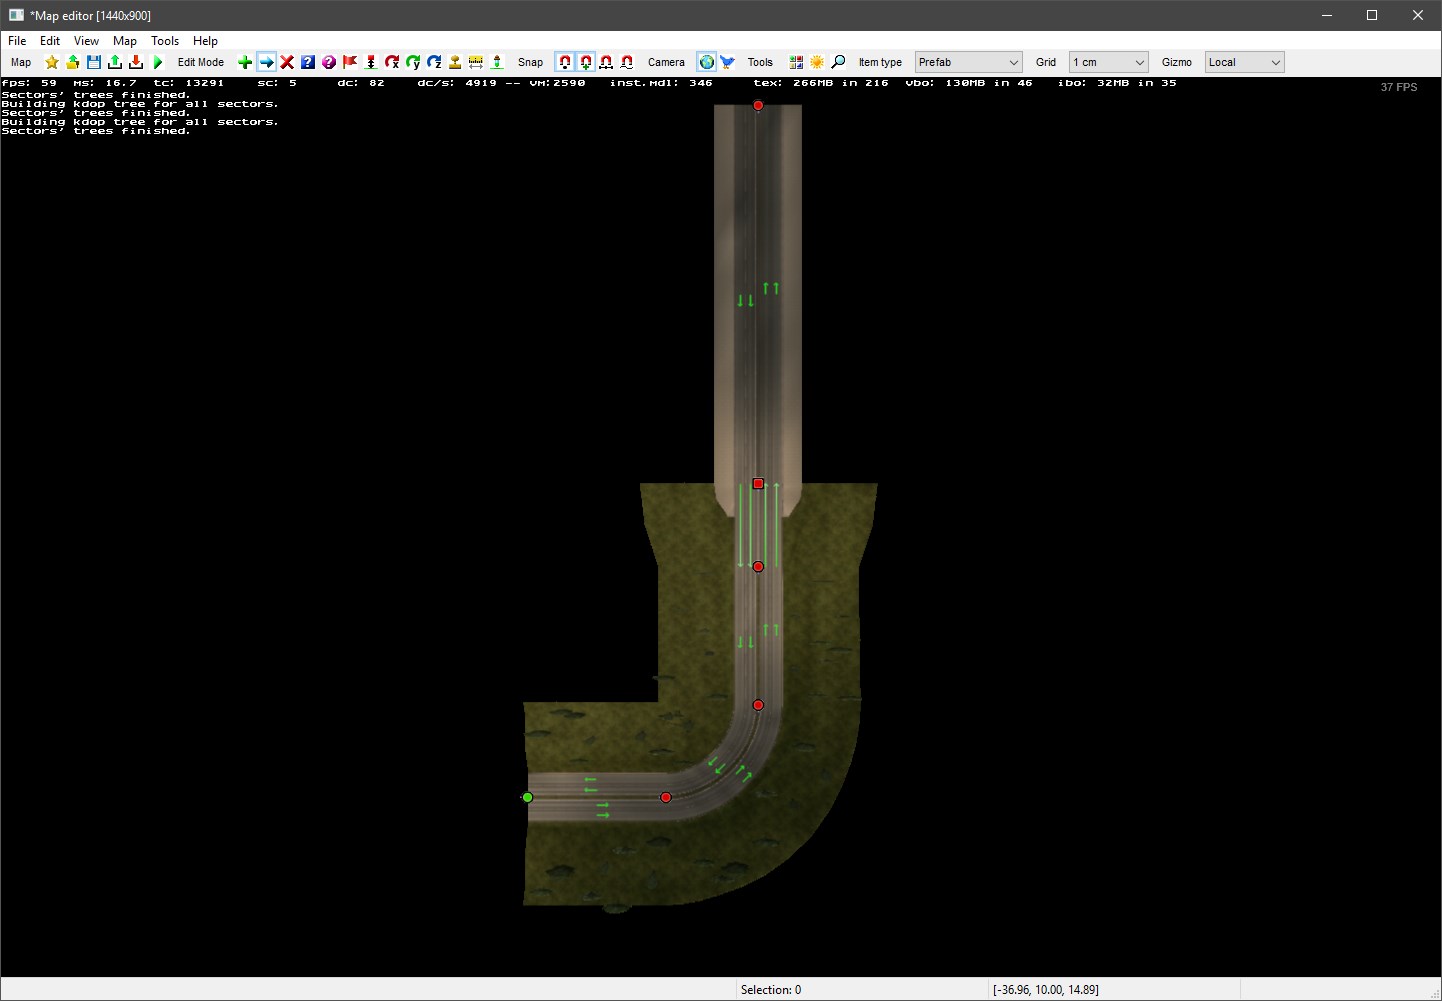
Your turn should now be a lot neater. You should open the second node in Item Properties mode and tick the checkbox named High-poly road, the result on the corner piece should be quite noticeable.

6. Prefabs
At the top of this current road, we’ll begin creating our city block. City roads are a different type of road, so we’ll use transition piece to connect the two. Interchanges, roundabouts and transition pieces are all prefab type objects in the SCS game engine.
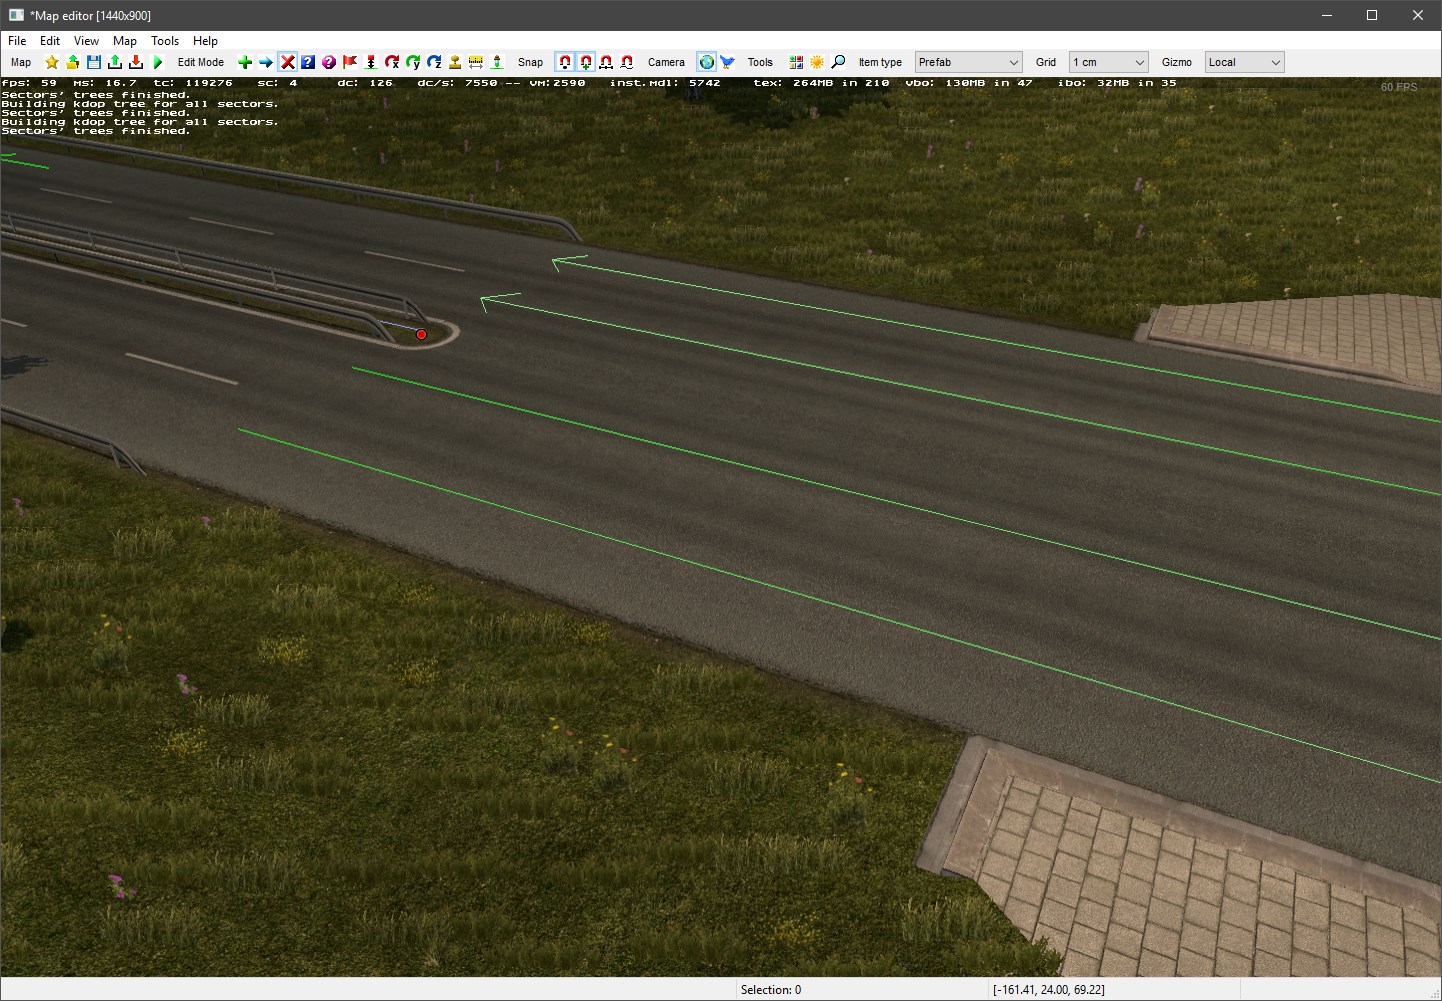
Open the content browser (shortcut F2) and change the type in the top-left box to prefab. Then, search for the road sidewalk end prefab. Ensure you’ve found the correct one, and not a 4m or uk variant. Double-click on the thumbnail to begin placing the prefab.
Place the prefab above the top road node. Ensure the direction is correct, with the sidewalk at the top of the prefab, then grab the bottom (green) node of the prefab in Move Item mode, and drag it to the red node of the road. It should snap into place.
You can add grass sides to this prefab now if you wish. As with the road, open the prefab in Item Properties mode to do this. Your prefab should now look like this.
7. City roads
City roads are similar to regular roads, except they have sidewalks on which pedestrians may appear. To create a city road, change the item type at the top of the editor back to road, then press the New Item button again.
The same road type should still be selected. Change the Type radio button to City road, then place another road above the prefab.
Road direction
You may have noticed that roads have an inherent direction, even though they are usually 2-way roads. The road you placed has two nodes. A red rear node, and a greed forward node.
The connections we can create are limited by these node directions. Principally, nodes should be connected from forward to rear nodes, that is red and green nodes connect, nodes of the same color do not usually connect.
| Node 1 | Node 2 | Valid Connection? |
|---|---|---|
| Red | Green | Yes |
| Red | Red | No, never connects |
| Green | Green | Only when necessary |
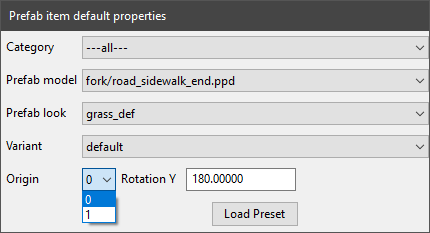
I can’t connect this!
We’ll cover this in more detail in a later tutorial, but occasionally you’ll come across an intersection that you can’t seem to connect, due to which node the prefab chooses as the rear node. Delete the intersection and return to the new item dialog. Use the Origin dropdown box to change which node is the rear node.
Configuring your city road
Ensure your road has the correct direction, with the green node at the south, then connect it to the prefab. Set the position of the rear node to 0, 10, -200, so that it remains straight.
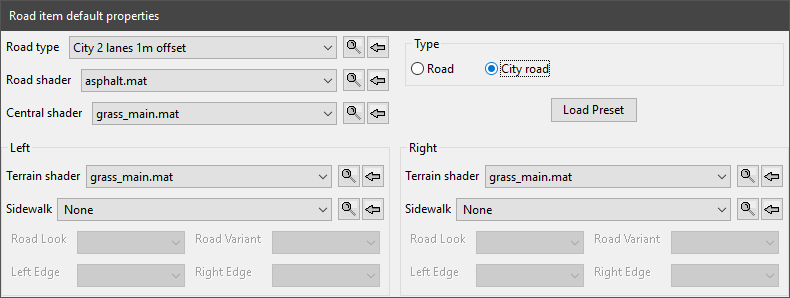
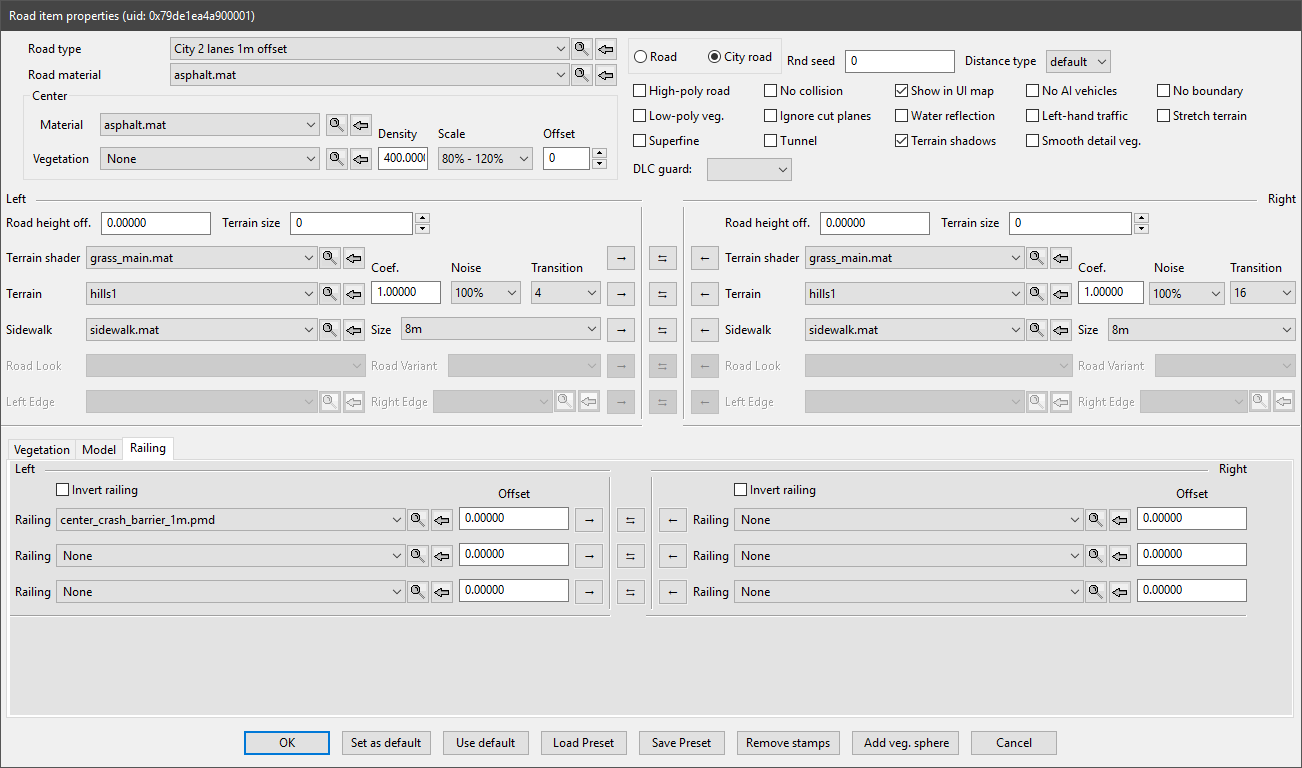
open the road segment in item properties mode. We need to set the sidewalk texture to match the prefabs texture, get rid of the outer crash barrier, and we can also get rid of the terrain within the city bounds. Your city road segment should have properties like the following image.
8. Expand the city
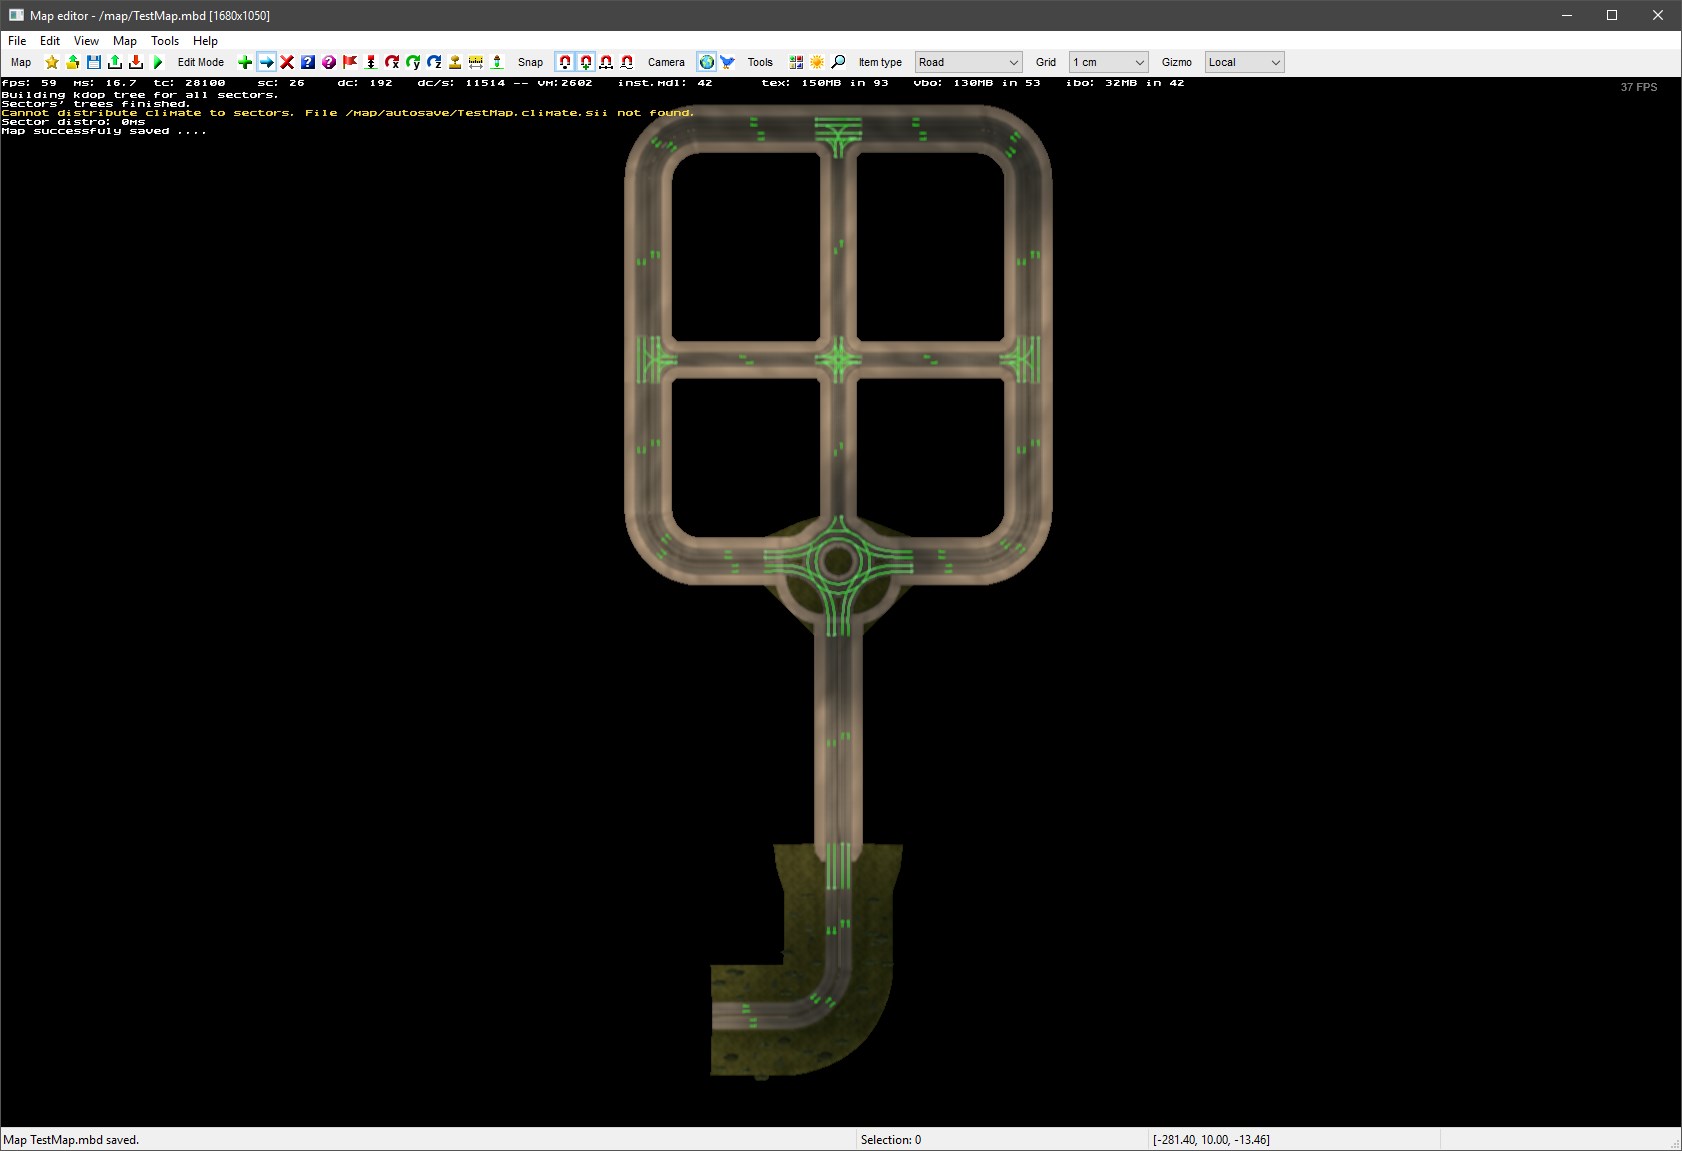
Your map should currently look like this.
Use city roads and prefabs to expand this map to something like the following:
We’ve covered the basics for road placement, and the rest of this city follows the same processes. Here are some hints to get you started.
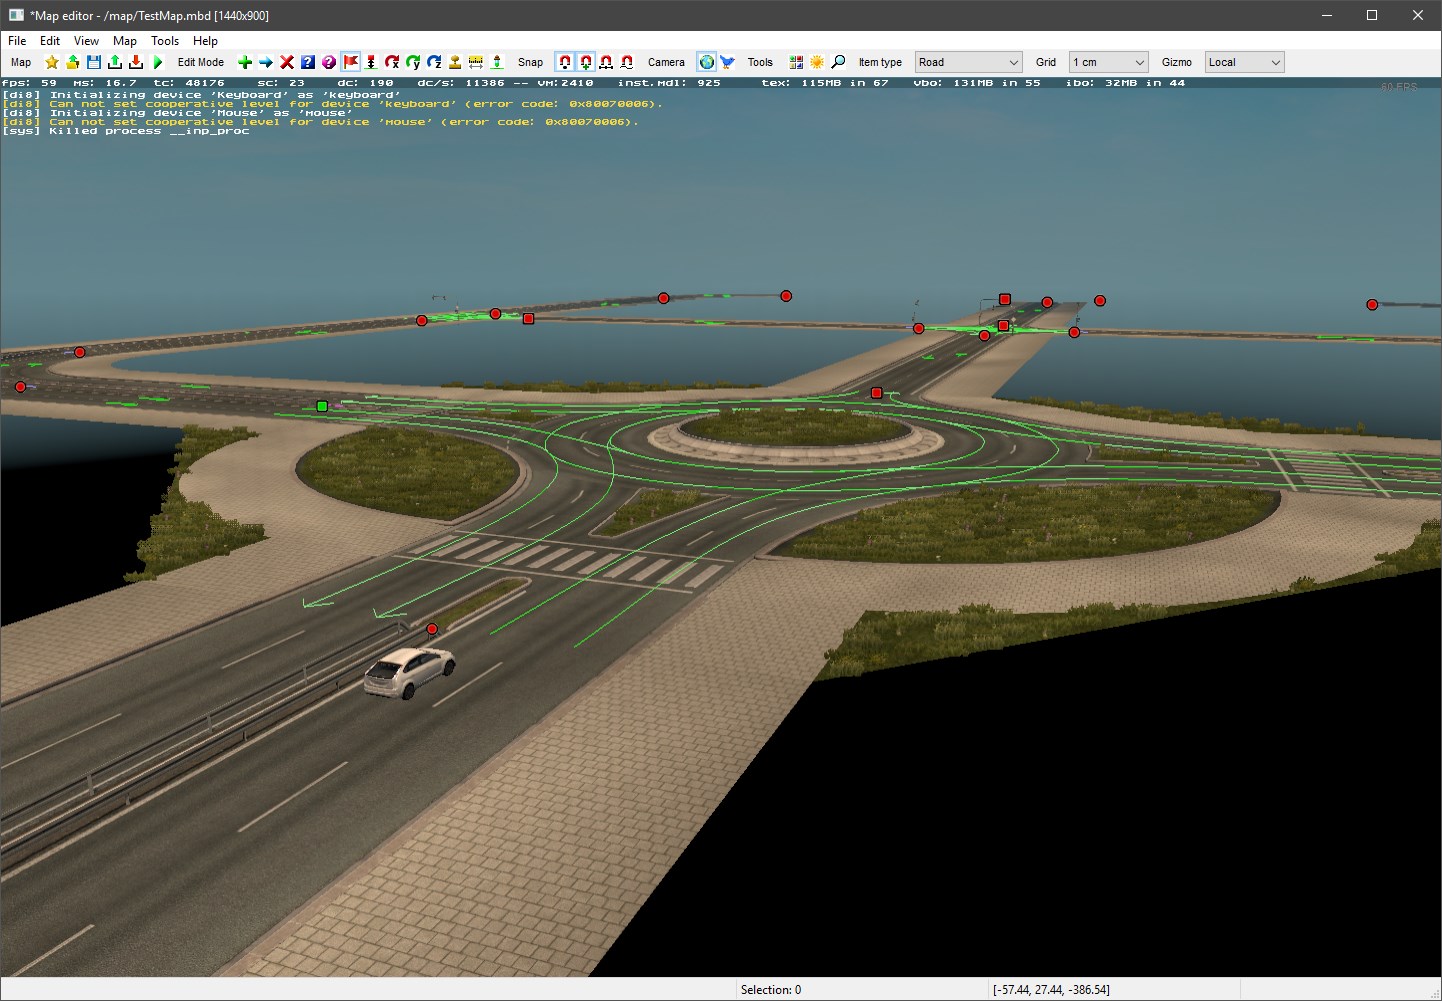
- The roundabout used is
r2xr2xr1 sw roundabout - The central roads are 2-lane roads. You’ll need to use the road type
Road 1 lane brokenfor these segments. - To find a suitable T-junction prefab:
- Search for
road2 road1 tin the content browser. These are the two road types that you are connecting. - Ensure your chosen prefab has one road1 connection and two road2 connections.
- Remember to choose one with an 8m sidewalk — not 4m — on all sides.
- Search for
- The cross junction can be found in a similar manner, this one uses road1 type roads only, so the name will include
road1 x road1. - If you run into trouble connecting prefabs, check Step 7, to ensure your prefab origins are correct.
9. Finishing the map
Once you’ve created your square, you’ve completed this tutorial and are ready to save and test your map.
Firstly, ensure the start car is placed in a sensible location. select the Place Start mode button, then click to place the car model in a sensible location. Then, go to File > Save As and save your map. I have called mine TestMap.mbd.
Proceed to the next tutorial to learn how to test the map, as well as how to load and continue editing it.
<- Tutorial 1 - Basic Editor Setup — Tutorial 3 - Loading and testing your map ->